Overview
This document walks through the steps of performing updates and exports using the Salesforce Data Loader tool. While dataloader.io can also be used for this purpose, that tool is subject to additional licensing and has limits to the number of records that can be exported or updated per run or in a given month. The Salesforce Data Loader tool isn’t subject to these restrictions, and it runs on your local device and connects directly to Salesforce. It also can utilize the bulk APIs to insert, update, export, upsert, etc. very large quantities of records at a time. Salesforce recommends the tool for batches of up to 5 million records at a time.
Data Loader Setup
- Follow the instructions in the link below to install Zulu Java OpenJDK/JRE and the Salesforce Data Loader program
https://developer.salesforce.com/docs/atlas.en-us.dataLoader.meta/dataLoader/loader_install_general.htm - Run the Salesforce Data Loader program.
Performing an Export
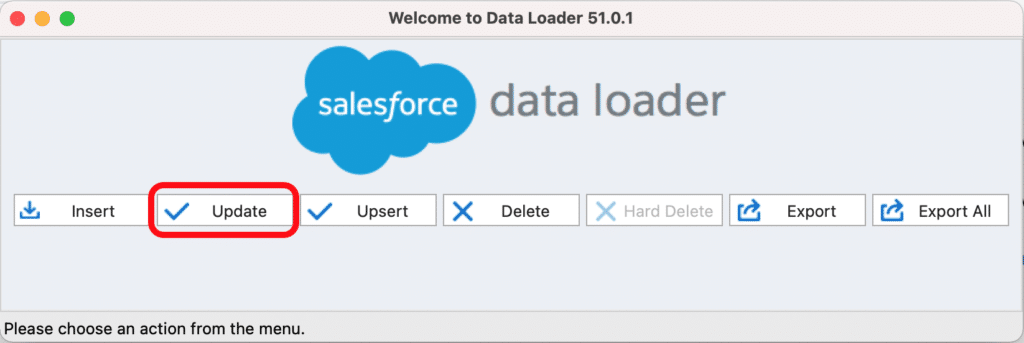
- Click Export

- You’ll be prompted to log in. Select either Sandbox or Production, depending on what system you intend to log into.
- Enter your credentials to log in.
- Note that in some orgs you may need to click Login with Custom Domain in order to get OAuth to work!
- You’ll be redirected to a page to choose the object you want export. If you don’t see it in the list, check the box next to “Show All Salesforce Objects”, then select the object you want to export.
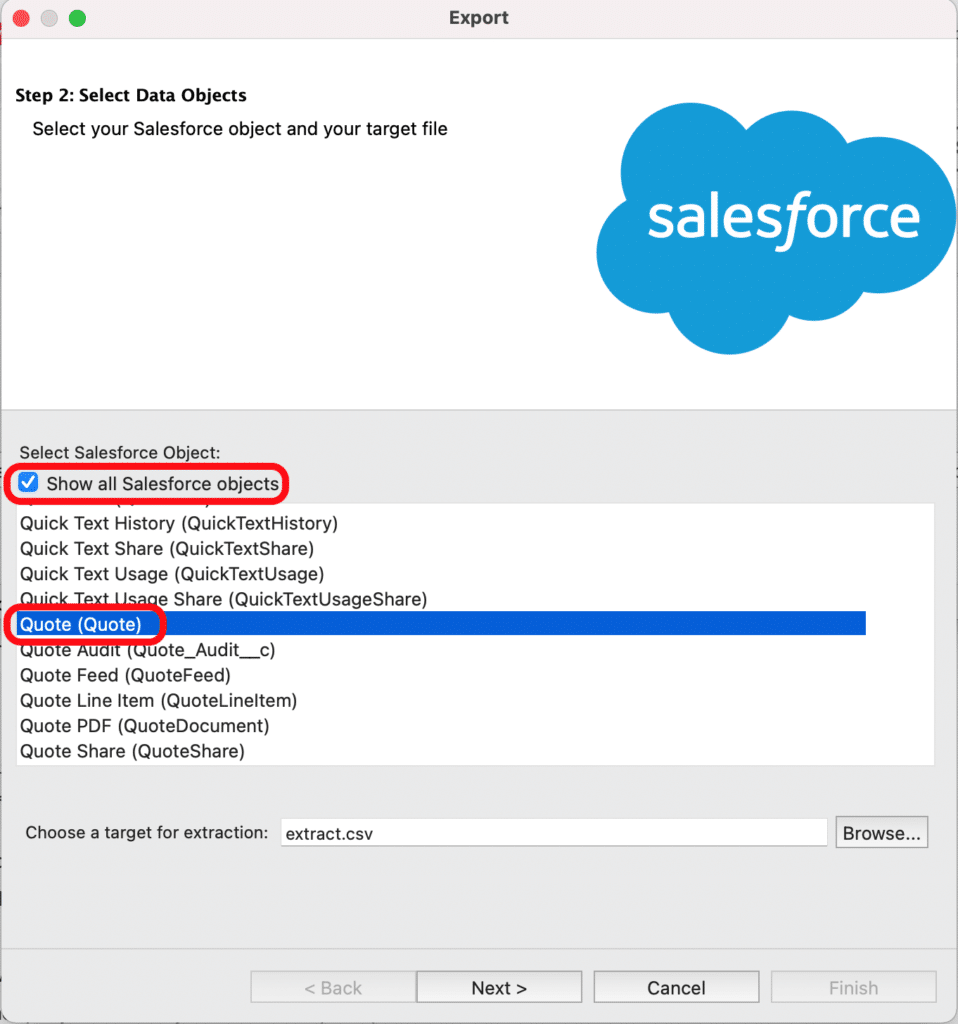
- At the bottom, click Browse… and choose a file name and location for the exported file. Click Save
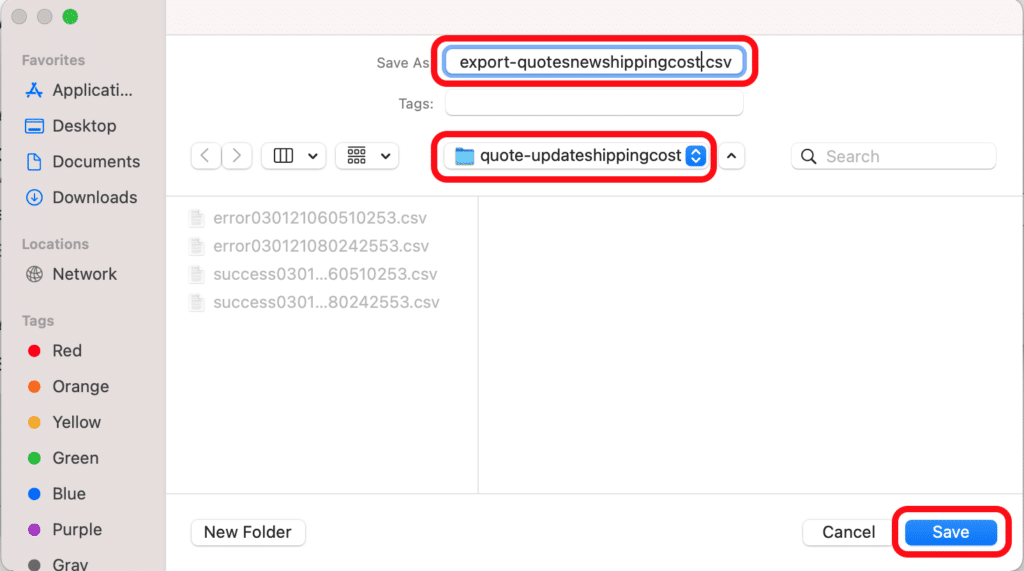
- You’ll see that the file name at the bottom has updated with the new file and path. Click Next >
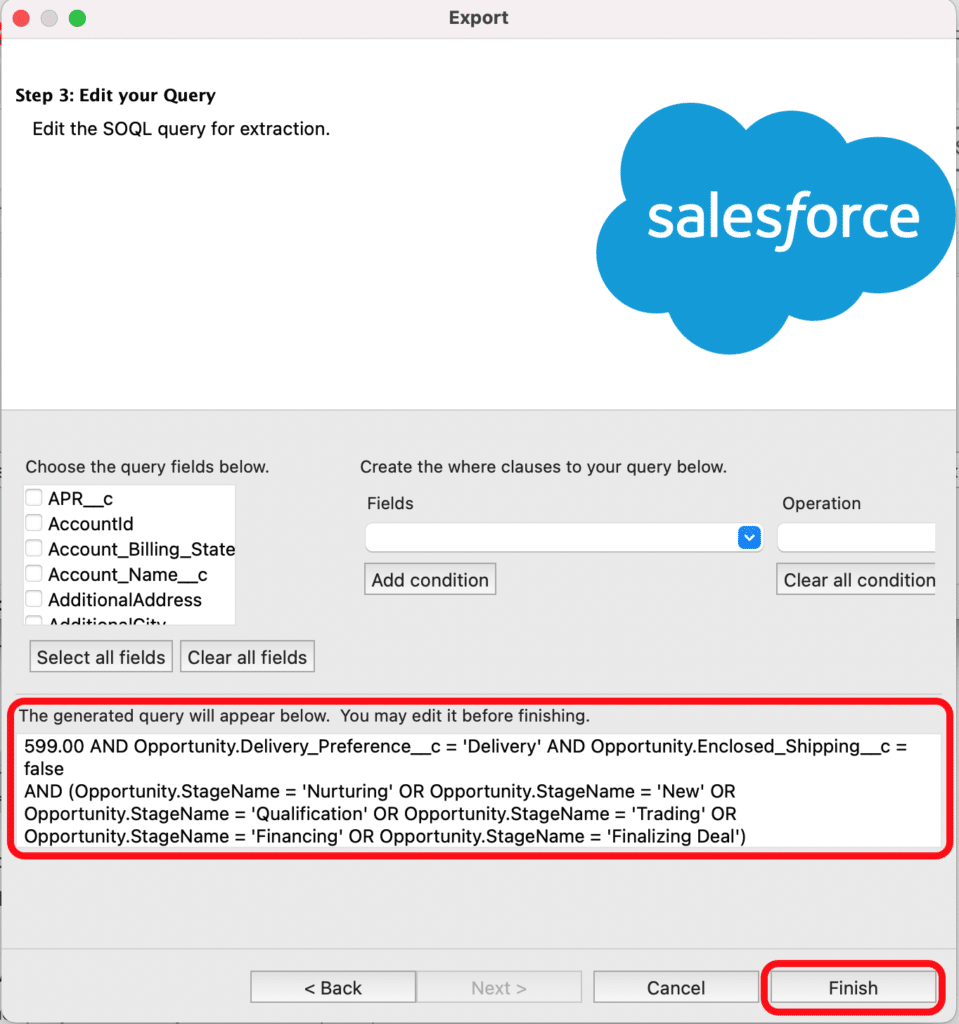
- On the next page, you will define the export. You can either enter a SOQL query that you’ve tested in the dev console, or you can choose fields to display on the left, and then enter filtering conditions on the right (you may need to expand the window to see all fields). When done, click Finish.
- You’ll be prompted to confirm that you want to export the records. Click Yes.

- You’ll receive a progress indicator as it exports the data.

- When complete, you’ll be asked if you want to view the data. You can just click OK or Close.
- You can now open the file to review in Excel or Numbers, or upload and open the file in Google Sheets.
Performing an Update
- From the Welcome Page, click the Update button.
- You may be prompted to log in. If so, see steps 2-6 in the export section. For step 7, you’ll be redirected back to the page shown here in step 3
- Choose a Salesforce Object. Note that you may need to click the box next to “Show all Salesforce objects”
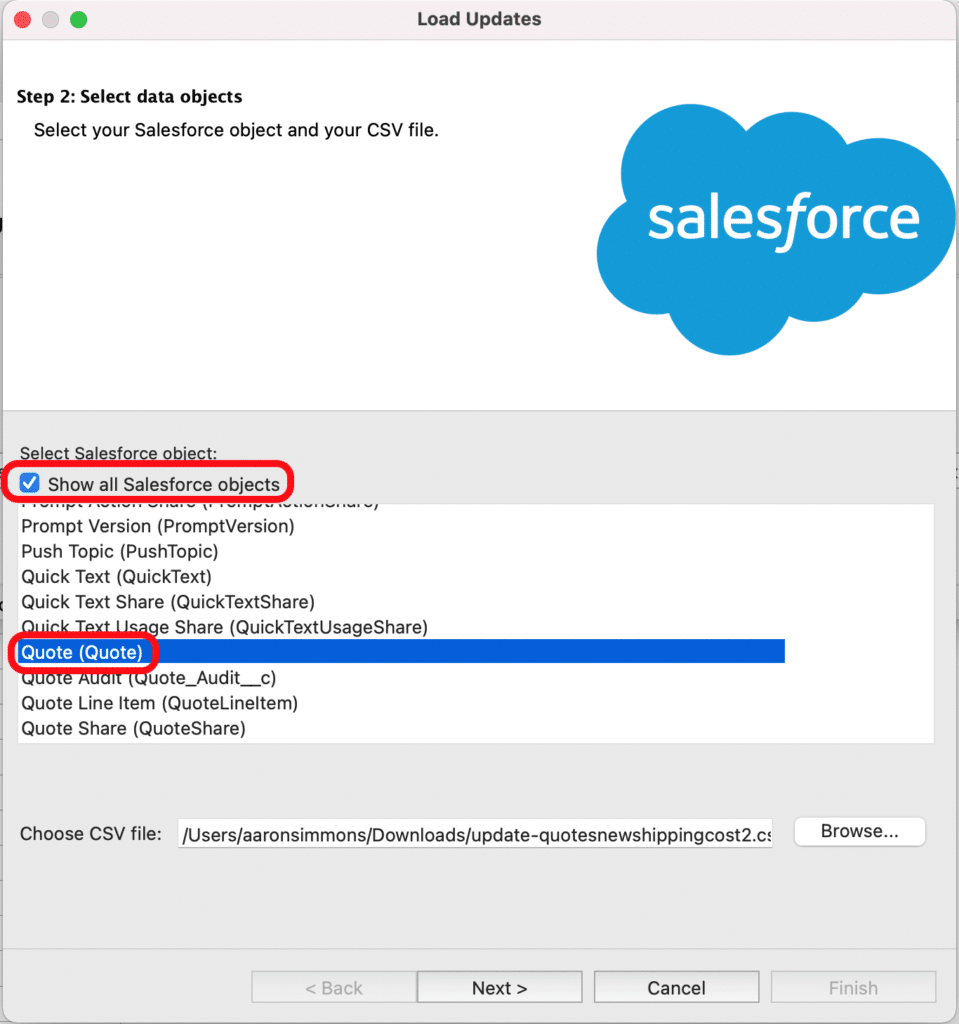
- Click Browse…
- Choose the files that contains the records you want to update. You’ll need at least an id field to identify the records and a column for the field you want to update. Click Open
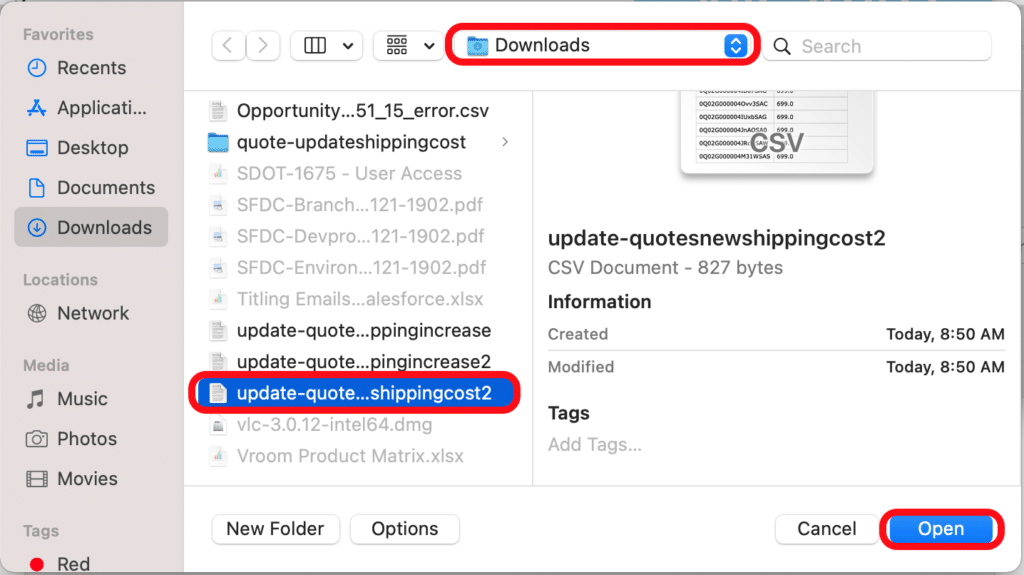
- The program will process the file to see how many records it is able to process, as well as scanning for issues like the wrong product selected and let you know how many records can be read properly. If the number of records looks correct, click OK.

- You’ll be presented with a screen that looks like this. If the File Column Headers do not look familiar, click < Back and upload the correct file. If not, then click Create or Edit a Map.
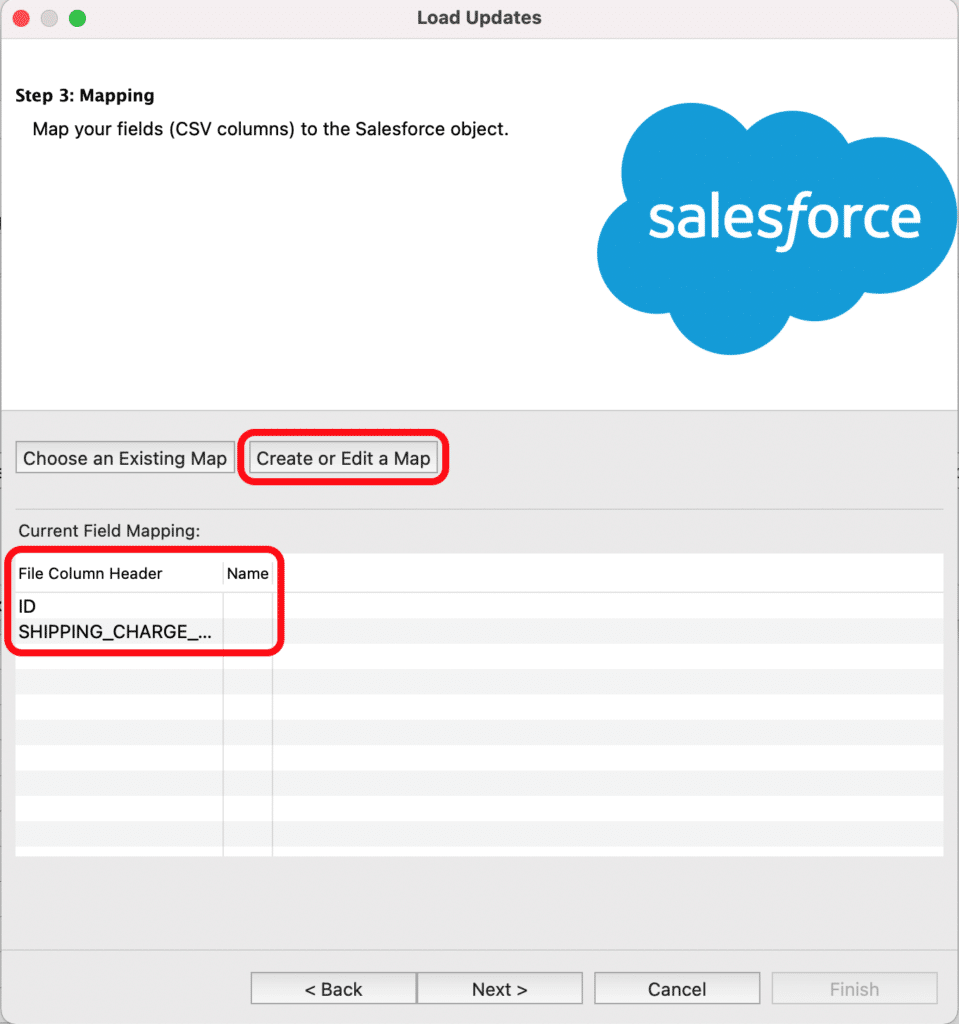
- From here, you’ll be selecting which field in Salesforce corresponds with the column header in your csv file. You can try Auto-Match Fields to Columns. It works reasonably well. Review its selections in the bottom-half of the window. If any are incorrect or blank, you may have to update the map by dragging components from the top section.
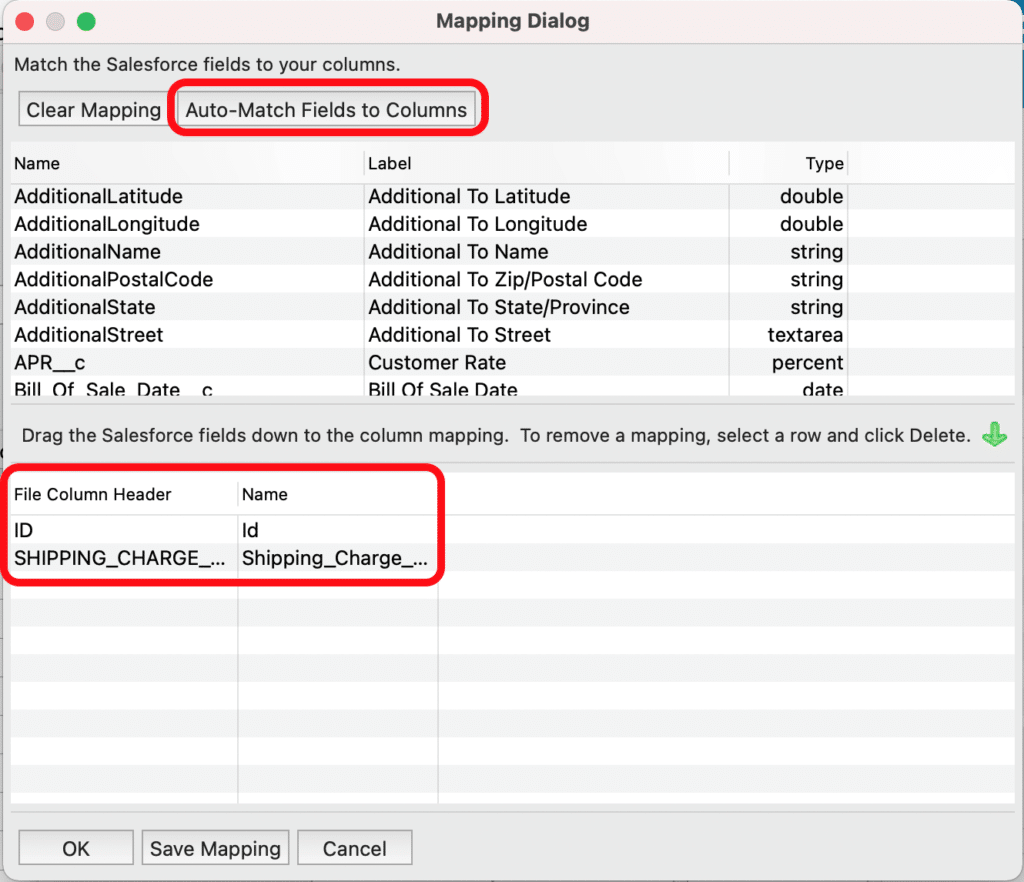
- When happy with the mapping, you can click Save Mapping if this is a manual import you expect to perform frequently, or just click OK.
- The field mapping should be update now on the Mapping page. If correct, click Next >.
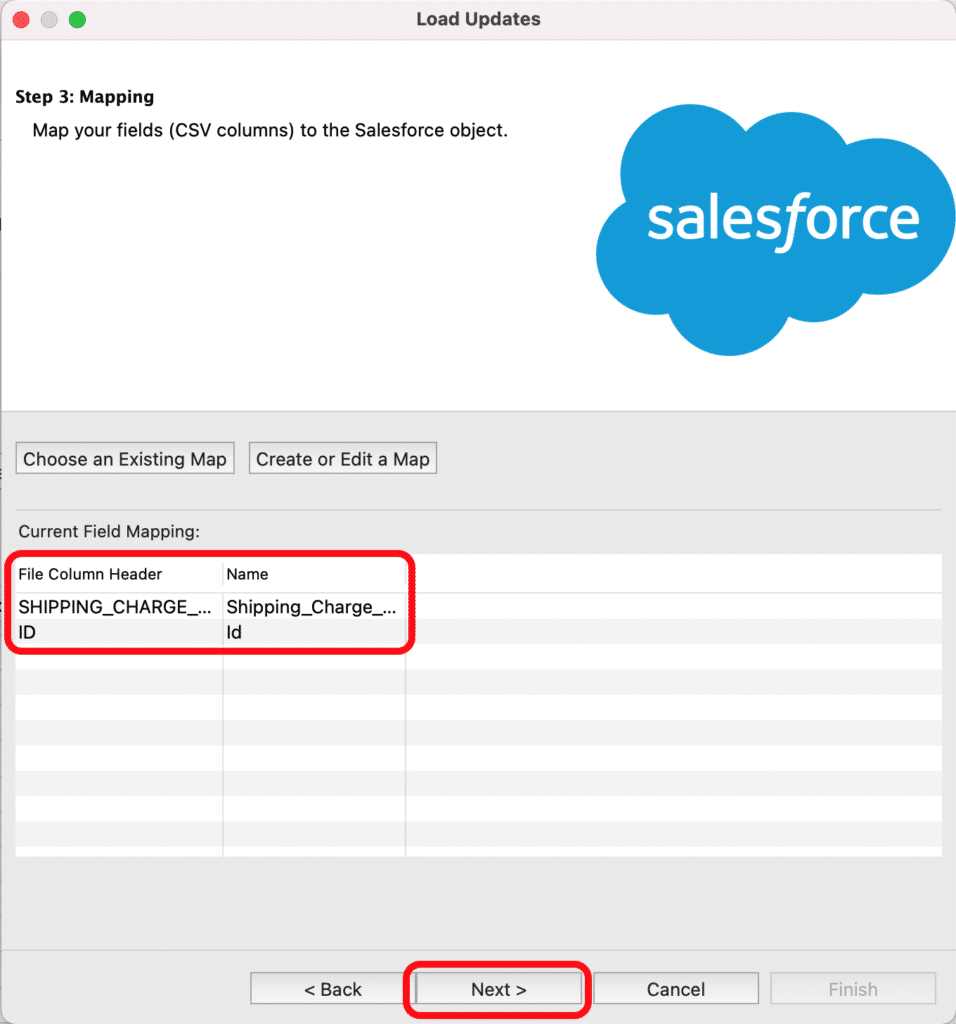
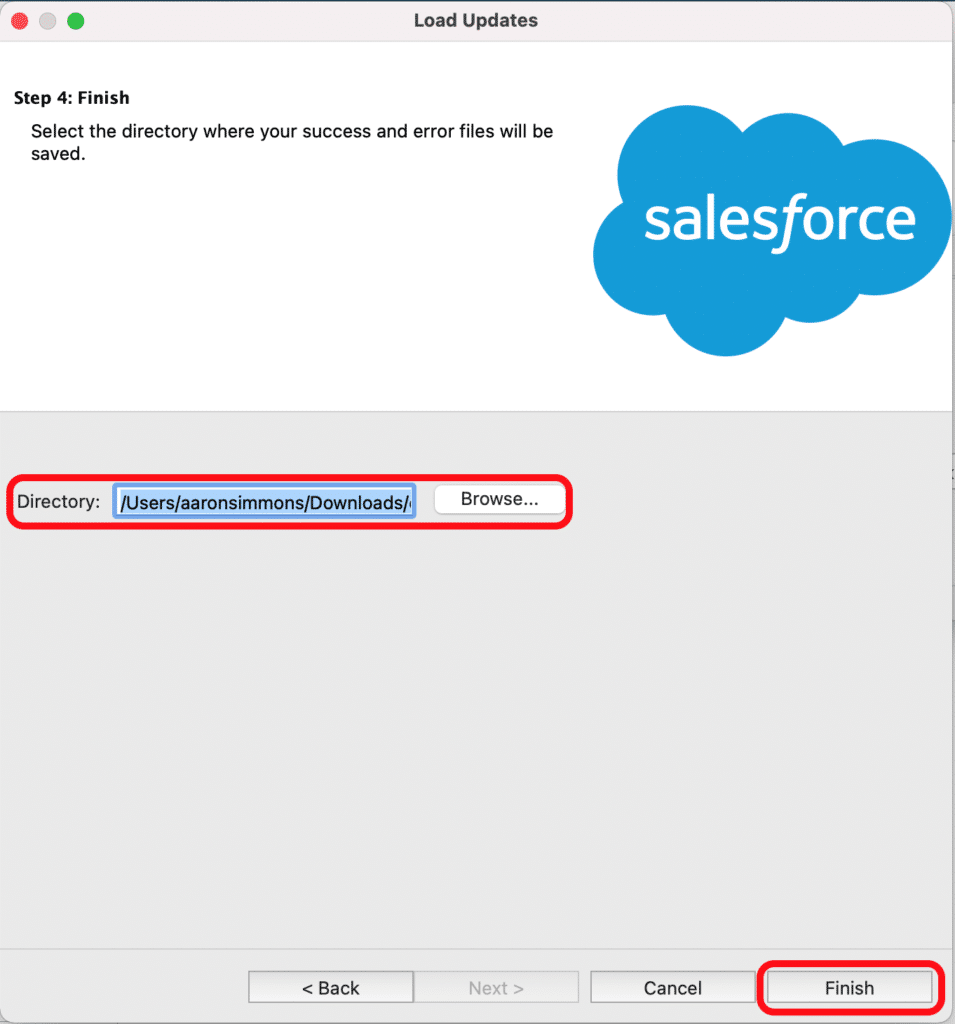
- On this final page, you’ll be asked where you put the log files. Click Browse… then create and/or select a directory where you want log files to be added. There will be a success log and an error log for each run, indicating whether the run was successful for that record or not, and why. After selecting a folder, click Finish.
- The program will increment through with whatever batch size you have configured, and provide an update every second or so of its progress on the update. When complete, it will prompt you to review the log files. You can do that for the errors, or just click OK. You’re done!

